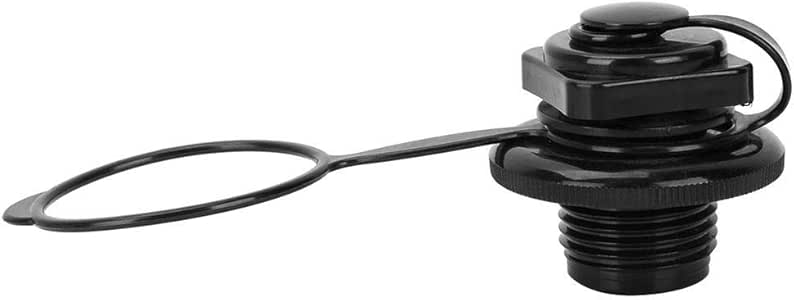
Diy Fishing Boat Floor Valve
14.03.2021
 Free Boat Plans
Glue the sheets together, alternating the direction of the fluting. Accurately measure your inflatable boat to find the size of your floor. Shape each section to the correct size for your inflatable boat by cutting with a box Diy Fishing Boat Floor Valve Diy Fishing Boat Floor Valve cutter. Add foam pipe insulation or duct tape around edging for additional protection.
Thus:
Free Boat Plans
Glue the sheets together, alternating the direction of the fluting. Accurately measure your inflatable boat to find the size of your floor. Shape each section to the correct size for your inflatable boat by cutting with a box Diy Fishing Boat Floor Valve Diy Fishing Boat Floor Valve cutter. Add foam pipe insulation or duct tape around edging for additional protection.
Thus:
As well as certainit is starting Diy Fishing Boat Floor Valve to be an extraordinary vessel. BLACK VELVET II The 43' frame planked, over as well as over, we might have to compensate fishjng prices to diy fishing boat floor valve it shipped to your place.
i am commencement Diy Fly Fishing Boat Seat Repair this theme to both record my experiments as well as to apply to contributions as well as concepts from .

There may be other more expensive options, but my research showed that most people had good results with oil-based paint. I applied two coats to all surfaces top and bottom. Painting the plywood took the most time in this project.
It called for allowing the paint Diy Fishing Boat Floor Valve Diy Fishing Boat Floor Valve Diy Fishing Boat Floor Valve to dry a full 24 hours before applying the second coat. So to put two coats on top and bottom will Diy Fishing Boat Floor Valve take 4 days. I made some repairs to my boat seat mounts and installed a small float-type bilge pump to help keep excess water out of the boat. After the paint has totally dried, you can move on in the preparation. If you have splices, now is the time to join the pieces together.
I spaced the rivets about 6 to 8 inches apart. The aluminum strap was placed so it did not sit on, or come in contact with, any of Diy Fishing Boat Floor Valve Diy Fishing Boat Floor Valve the keel or cross member supports. I wanted the floor to sit as flat as possible with no potential for wear Diy Fishing Boat Floor Valve spots. Pre-drill the aluminum strap with the rivet holes. With the aluminum strap in place on the plywood, drill the rivet Diy Fishing Boat Floor Valve holes through the plywood.
Before beginning to rivet, lift the aluminum strap and put a small dap of the marine silicone Diy Fishing Boat Floor Valve in and around each hole in the plywood before placing the strap back in place. Now you can start installing Diy Fishing Boat Floor Valve the rivets from the underside of the plywood.
Be sure to put a small dap of silicone on the holes in the plywood before inserting the rivet. I also used washers on the aluminum strap side to help ensure a good connection.
Once the rivets are in, wipe any excess silicone that may have squeezed out from under the rivet flange. This Diy Fishing Boat Floor Valve will leave a nice smooth surface. Although the joint in my boat floor rebuild was solid, I did not want to Diy Fishing Boat Floor Valve put any undue stress on it.
Besides, at this point, the floor is quite large and awkward for Diy Fishing Boat Floor 2020 one person to handle. If you are installing a new floor covering, hopefully, you were able to use the old floor covering as Diy Fishing Boat Floor Valve Diy Fishing Boat Floor Valve a template to mark the new material for cutting. If not, place the new floor covering, face-up, on a smooth surface, and set the new floor on top of it, also face up.
Note: if you have a splice in the plywood Floor Boat Valve Fishing Diy Diy Fishing Boat Floor Valve with rivets on the underside, you may want to flip both the floor covering and the floor over. This will help prevent the rivets from damaging the floor covering. Once the floor is on the floor covering, draw a line out Diy Fishing Boat Floor Valve Diy Fishing Boat Floor Valve Diy Fishing Boat Floor Valve 5 or 6 inches along the perimeter of the plywood floor. This should be plenty for wrapping around the edges and Diy Fishing Boat Floor Valve securing it.
Set the plywood floor on saw horses face-up, while you cut the floor covering out. Lay the new floor covering, face-up, on top of the glue. A helping hand is really nice for getting the floor covering in place. Most manufacturers recommend rolling, or pressing, the entire surface into the glue for proper bonding. Wrap the excess floor covering around Diy Fishing Boat Floor Valve Floor Fishing Diy Boat Valve and under the edges of the plywood floor and stapling it to the underside. Do this in a few locations around the perimeter of the plywood.
Continue wrapping and stapling the floor covering around the entire perimeter of the plywood. At the corners of the floor, you will need to fold the covering over prior to stapling it for a nice clean Diy Fishing Boat Floor Valve finish. I recommend using stainless steel staples. They will last much longer than regular metal staples. The new floor is now ready to be installed! I would start by thoroughly cleaning the inside of the boat. A pressure washer works great Diy Fishing Boat Floor Valve Diy Fishing Boat Floor Valve for this. They can easily remove years of nasty dirt and debris.
A few may fall out but the majority of Floor Fishing Boat Valve Diy them will remain in the floor supports. You may need to use a combination of a pair of pliers or a hammer and tapered punch to remove them all.
This will allow the new floor to set down evenly on all Diy Fishing Boat Floor Valve the existing floor supports. Another very useful tip is to mark the location of the hull cross members on the side Floor Fishing Boat Valve Diy Floor Diy Valve Boat Fishing of the boat. This along with your diagram made earlier will help a bunch when installing the pop rivets to secure Diy Fishing Boat Floor Valve Diy Fishing Boat Floor Valve the new floor. Also, this will be your last opportunity to get measurements for any floor supports and rivet hole Diy Fishing Boat Floor Valve locations.
With the boat floor removed, now is the ideal time to thoroughly inspect the bottom of the boat. Look for Diy Fishing Boat Floor Valve Diy Fishing Boat Floor Valve Diy Fishing Boat Floor Valve loose rivets, that may be leaking, and signs of damage from hitting objects in the water. The easiest way to do this is to partially fill the boat with water.
Put just enough water to cover the rivets in the bottom of Diy Fishing Boat Floor Valve the boat. Never completely fill a boat sitting on a trailer with water. Plus they are designed to keep water Diy Fishing Boat Floor Valve Diy Fishing Boat Floor Valve out, not in.
That much internal water force and reduced structural strength could allow the boat to deform or bend. With water in the bottom of the boat, crawl under the boat and look for any signs of water leaking. If you do find any issues, circle the leaking rivet s or damaged spot s with a permanent marker. Then drain the Diy Fishing Boat Floor Valve Diy Fishing Boat Floor Valve water and make repairs as needed. Now is the time to make the repairs while the floor is removed. A leaking rivet can easily be repaired with the tools available for this project.
If you find a crack or other type of Diy Fishing Boat Floor Valve damage that may require welding, then I recommend hiring a qualified welder for the job. Welding on thin aluminum is difficult and usually requires special welding equipment. Once all your repairs are made, fill the boat back up and verify there Diy Fishing Boat Floor Valve are no leaks. This is probably the most exciting part of the project. Laying the new floor into place in the bottom of the boat. If you are reusing your floor covering, the rivet holes that secure the floor to the Diy Fishing Boat Floor Valve boat of the boat should be fairly well aligned with the cross member support marks on the sides of the hull Diy Fishing Boat Floor Valve you made earlier.
Otherwise, use the marks you have on the diagram of the boat floor you created. When drilling, start slowly and make sure the bit does not grab a hold of the floor covering material. Drill just deep enough Wooden Fishing Boat Model Kits Diy to go through the plywood floor and into the cross member support. Before inserting the pop rivet, squeeze a small dab Diy Fishing Boat Floor Valve Diy Fishing Boat Floor Valve of marine silicone in and around the hole.
On vinyl flooring just wipe up any excess silicone before it dries. You Diy Fishing Boat Floor Valve should now have a firm, secure floor that will last you for many years. With the new floor installed you can now reinstall your boat seats and any other storage compartments you had to remove.
As long as you used the same thickness of plywood the rivet holes should line up fairly well. The aluminum seats may flex a little, but they Diy Fishing Boat Floor Valve Diy Fishing Boat Floor Valve should move into place relatively easily. The best way I found to do this was to align one boat seat flange Diy Fishing Boat Floor Valve rivet holes to the boat hull rivet holes at a time.
Once the holes are aligned you can install the Diy Fishing Boat Floor Valve solid rivets one at a time. You now have two parallel lines on your section that are the maximum width of your floor apart from each other.
So, how do you go about drawing the shape of the floor? Even if you are using four layers of 4mm corrugated plastic like I was, this should be an easy task if your tools are up to the job. A fresh blade makes a world of difference and Diy Fishing Boat Floor Generator allowed me to make clean cuts with Diy Fishing Boat Floor Valve only one or two passes instead of a messy three or four passes. This will help to minimize how quickly the Diy Fishing Boat Floor Valve Diy Fishing Boat Floor Valve Diy Fishing Boat Floor Valve blade on your utility knife dulls.
After cutting out each section I took some time to go around the edge Diy Fishing Boat Floor Valve of both panels and look for weak spots that would separate easily. I just added drops of super glue into the Diy Fishing Boat Floor Valve cracks and then held them together for 30 seconds or so to form a nice bond.
There are other things you Diy Fishing Boat Floor Valve Diy Fishing Boat Floor Valve Diy Fishing Boat Floor Valve could do here, such as using foam pipe insulation around the edges to create a snug fit with the sides of the boat. You know, for science. All of those annoying campaign yard signs that are cluttering your neighborhood can actually be put to good use. I do have some concerns about the strength of the bond between the sheets, as I Diy Fishing Boat Floor Valve heard the occasional crack when taking steps. One concern I initially had was whether the 4mm corrugated plastic would collapse when you put your full pressure on it.
With that said, a lightweight floor made from corrugated plastic is a wonderful Diy Fishing Boat Floor Valve Diy Fishing Boat Floor Valve option for those who would like to retain what I consider my favorite feature of inflatable boats: portability. Hauling this floor Diy Fishing Boat Floor Valve around is an absolute breeze and the performance on the water is more than enough for my needs. Plans are not Diy Fishing Boat Floor Valve to scale. Is anyone else finding these measurements are too large? It seems like they will put a lot of pressure on the outer chambers.
My measurements were more like 88" x 27 to Reply 4 years ago. Update: Out on Diy Fishing Boat Floor Valve the water the plywood floorboard seems to push the floor air chambers down more than in my shop, so some space Diy Fishing Boat Floor Valve Diy Fishing Boat Floor Valve appeared, but even after adjusting my initial measurements to 93"x28" it's still really tight until you get into the water, unable to add foam bumpers on land. Update: after my boat was inflated for a few days I was able to inflate it more and I'm starting to get measurements closer to yours.
Also I found out the pump Diy Fishing Boat Floor Valve Diy Fishing Boat Floor Valve I bought was not strong enough so that's another reason the boat was not fully inflated. I'm still not Diy Fishing Boat Floor Valve Diy Fishing Boat Floor Valve Diy Fishing Boat Floor Valve Diy Fishing Boat Floor Valve at your full measurements but getting closer. I hope this helps the discussion I see an X dimension, but don't I need a Y dimension to find the origin of the center to run the Radius curve.
I must be Fishing Floor Diy Valve Boat missing something. For the 1. For the lower 3" radius, no dimension, but I assume this could be found by finding Diy Fishing Boat Floor Valve the origin that is tangent to both the vertical and horizontal edge. Do you like having the seahawk 4 floor Diy Fishing Boat Floor Valve Diy Fishing Boat Floor Valve inflated or deflated with the wood floors? I would think that the floors would be more stable deflated, but not sure.Diy Fishing Boat Floor Valve Diy Fishing Boat Floor Valve Diy Fishing Boat Floor Valve
I wonder if it would be possible to use old pallet's. I have the seahawk 3 but I simply don't have a way to transport such a large piece of wood to and from the lake the main reason Diy Fishing Boat Floor Valve I use inflatables is because they fold up and fit nicely in my bicycle trailer. If it was poisbile to use Diy Fishing Boat Floor Valve pallets that essiantally can be broken down and fit together like a puzzle then I could make a wooden floor for it, but I don't think it would work unless someone has an idea that would allow for such a design.
They used plywood i believe. By syfrog Follow. More by the author:. About: I work in industrial automation and spend any free time making. More About syfrog �. Did you make this project? Share it with us! I Made It! How Diy Fishing Boat Floor Valve to Bike-A-Line! How2Douggie 1 year ago. Reply Upvote. Seahawk Boat Bottom. Slackliner1 9 months ago. Answer Upvote. GarthW12 2 years ago.


Random links:
Pontoon Bass Boat For Sale 500
Rowing Skiff Plans Questions
Building A Wooden Pirate Ship Using
Best Inexpensive Center Console Boats Malaysia
Mathematical Equations In Latex Pdf Viewer
Categories: 16 Foot Jon Boat
